Showing posts with label Perfectly CAS. Show all posts

Sunday, 17 April 2022

Gold Bauble

I made this gold bauble for the Perfectly CAS challenge using lots of teeny snippets of gold mirri and gold pearlescent card.

I die cut a stitched rectangle from a snippet of white hammer card and attached it to the card blank.  I die cut the Cabrini Ornament from both gold mirri and gold pearlescent card - embossing the pearlescent bauble so the veins in the leaves were prominent.  I then attached the mirri bauble to the card blank and inlaid the pearlescent pieces.  I die cut the Crisp Bow from gold mirri, snipped the tail from the bow and attached it to the top of the ornament.
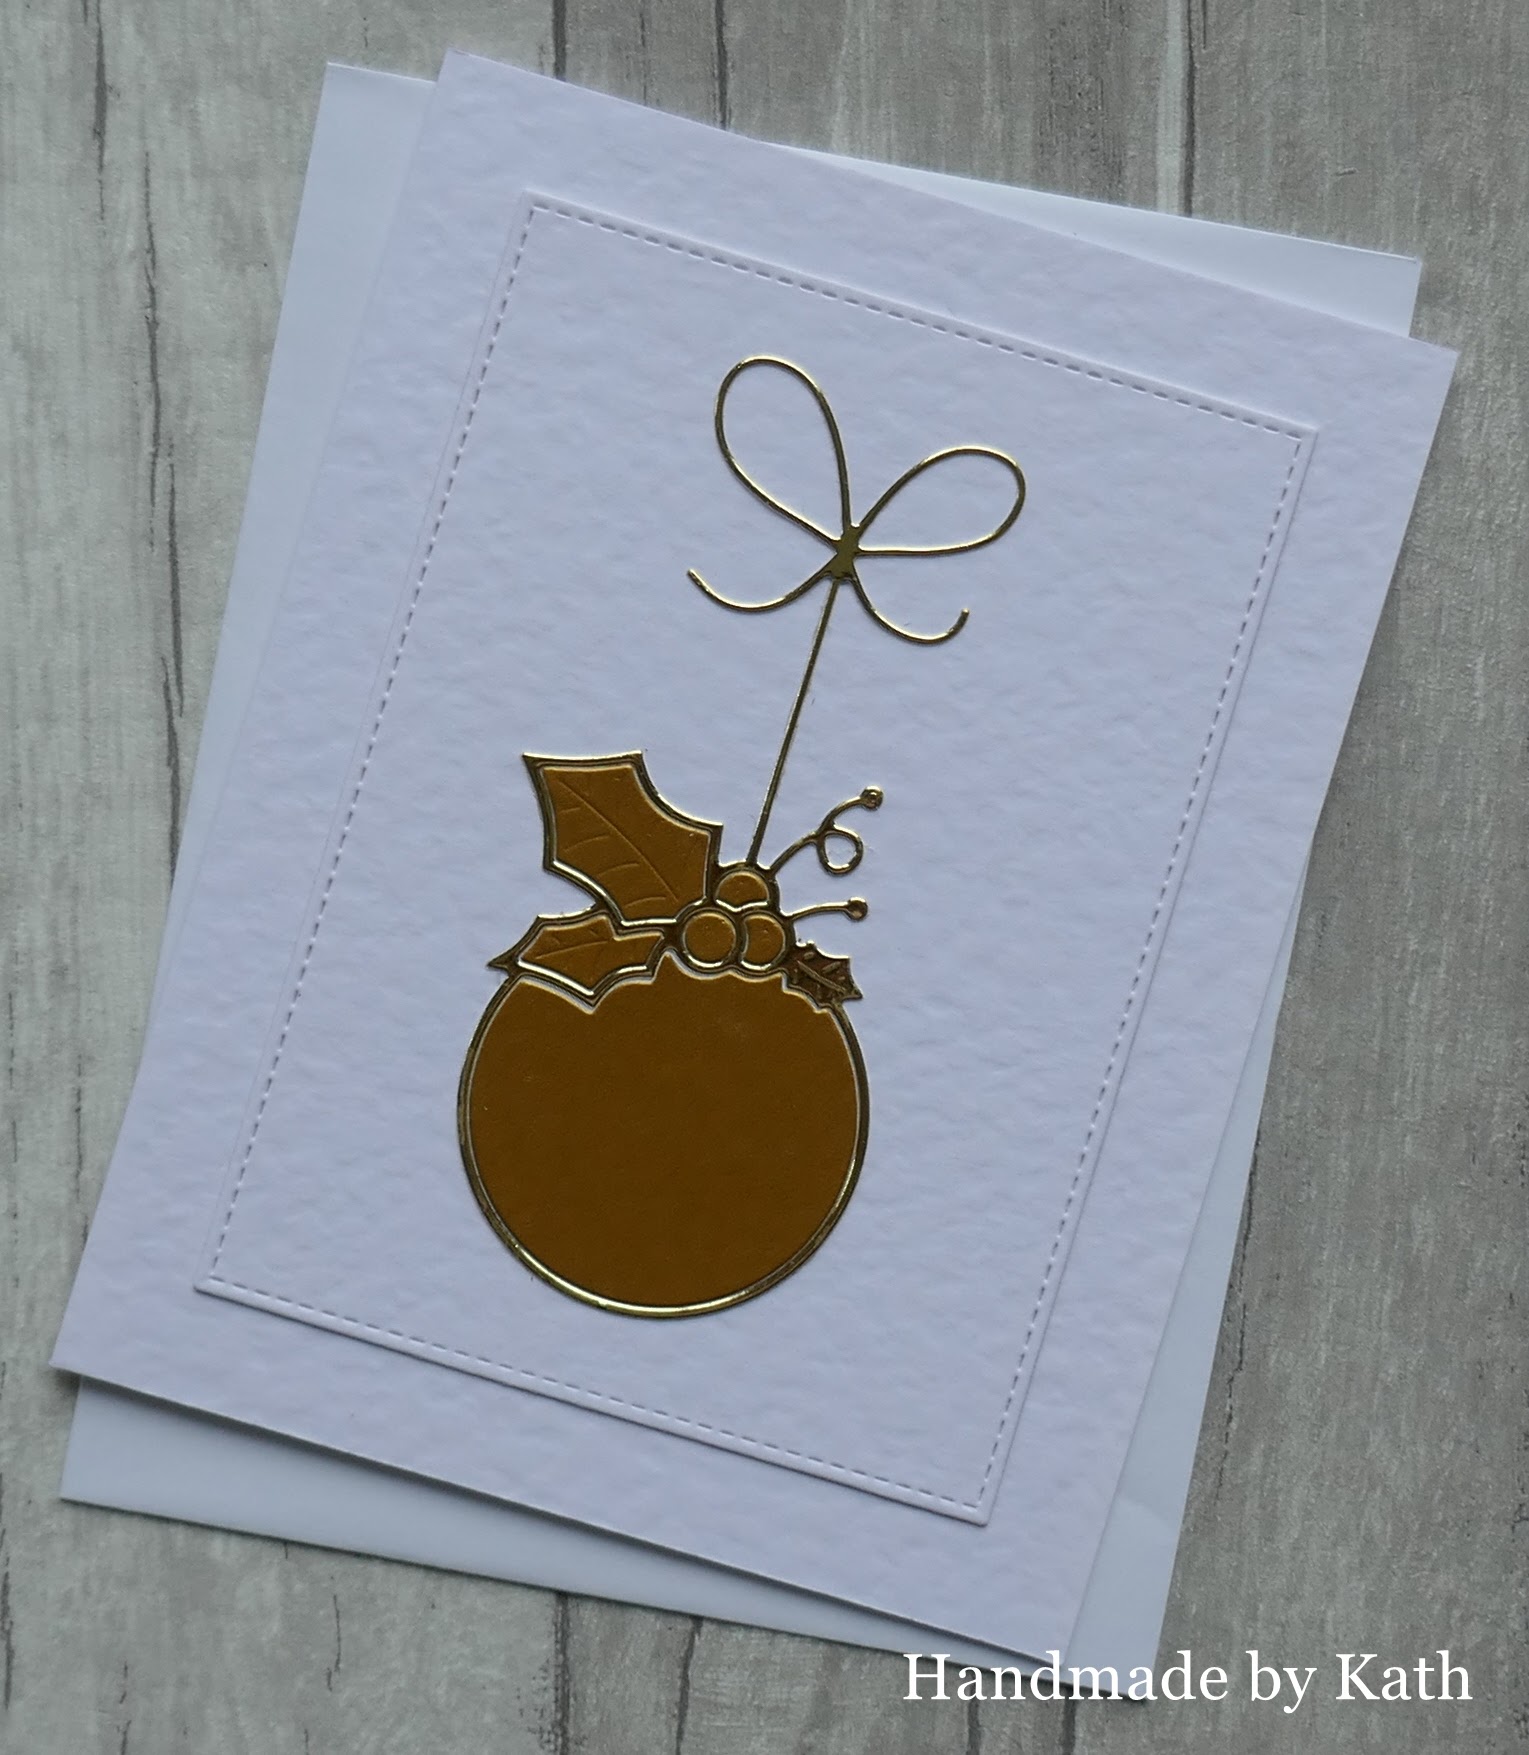

To make this card I used:
     5.5" x 4.25" white matt card blank
     Memory Box 'Cabrini Ornament' and 'Crisp Bows' dies
     Snippets of white hammer card, gold mirri and gold pearlescent card

I am entering the following challenges:
     Happy Little Stampers Anything Goes with Dies - April Challenge
     Happy Little Stampers Christmas Challenge - Anything Goes
     Perfectly CAS - Gold
     Snippets Playground - Challenge 426


Kath x

Friday, 22 January 2021

Reindeer and Stacked Lines

This card was made using another new stencil from Funky Fossil.  The stencil  has four stacked lines but I used just one to make a band across the bottom of the card.

I trimmed a piece of white card so it was slightly smaller than the card blank and stencilled the stacked lines across the bottom.  I placed the card into my MISTI before stamping the reindeer and sentiment.  The reindeer had got snowflakes on his back which allowed the stripes to show through, so I used a fine paintbrush and black ink to paint the snowflakes so they blended with the back of the reindeer giving a clear silhouette.

To make this card I used:
     6" x 6" white matt card blank
     Hot off the Press 'Reindeer' and Clearly Besotted 'Cheerful Christmas' stamps
     Funky Fossil 'Stacked Lines' stencil
     Versafine Onyx Black and Deep Lagoon inks
     White card

I am entering the following challenges:
     AAA Cards - Up to One Third
     CAS Christmas - Silhouette
     Christmas Kickstart Challenge - Such a Deer
     Happy Little Stampers Stencil Challenge - Anything Goes
     Perfectly CAS - Stencils
     The Male Room - Animals

Kath x  

Wednesday, 18 March 2020

Happy Anniversary

My final card today is an Anniversary card for a few of my favourite challenges.

I die cut the wicker panel from a snippet of warm white hammer card and attached it across a square of the same card.  I rounded the corners before attaching the panel to the card blank.  I stamped the sentiment below the wicker panel using grey ink and clear embossing powder.  I die cut four hearts from snippets of red textured card and four hearts from snippets of raspberry textured card.  I attached the red outline hearts to the wicker panel and inlaid the pink centres.


To make this card I used:
     6" x 6" warm white hammer card blank
     Memory Box 'Wicker Panel' and Creative Expressions 'From the Heart - Female Relations' dies
     Hobby Art 'General Greetings' stamp
     Woodware Regular Corner Rounder punch
     Memento Gray Flannel ink
     Stampendous clear embossing powder
     Snippets of white hammer card, red and raspberry textured card

I am entering the following challenges:
     Happy Little Stampers CAS Challenge - Use your Favourite Technique (for me, that's die-cutting)
     Less is More - Colour Challenge - Red, Raspberry and Grey   
     Perfectly CAS - Die-cuts
     Pixie's Snippets Playground - Challenge 373

Kath x

Wednesday, 22 January 2020

With Sympathy

There are a few 'One Layer' challenges this week, perfect for this CAS Sympathy card.

I placed the card blank into my MISTI and placed the sentiment stamp in the lower corner and the 'Wheat' stamp so it was off the edge of the card as I only wanted a section of the stamp.  I stamped the image and sentiment a few times to get a good sharp image and then embossed them with clear embossing powder.


To make this card I used:
     6" x 6" white matt card blank
     Woodware 'Wheat' and Clearly Besotted Fancy Sayings' stamps
     Versafine Vintage Sepia ink
     Stampendous clear embossing powder

I am entering the following challenges:
     AAA Cards - One Layer     
     Less is More - One Layer Card Off Centre
     Perfectly CAS - One Layer

Kath x

Wednesday, 18 December 2019

Two Hearts

I made this card for this week's Allsorts challenge - although I wish I could now stop humming 'Two Hearts'!

I cut a piece of card slightly smaller than the card blank, rounded the corners and attached it to the centre.  I die cut 'Celebrate' from red mirri card and attached it o the lower edge of the card.  I die cut the hearts from both red mirri and red pearlescent card - inlaying the pearlescent heart inside the mirri heart.  The larger heart was attached to the card front with the smaller heart attached with a foam pad on top.


To make this card I used:
     6" x 6" white hammer card blank
     Creative Expressions 'From the Heart - Female Relations' hearts and Poppy Stamps 'Celebrate' dies
     Whie hammer card, snippets of red mirri and red pearlescent card

I am entering the following challenges:
     AAA Cards - Along the Edge
     Allsorts - Inspired by a Song (I chose Two Hearts by Phil Collins)
     Happy Little Stampers Anything Goes With Dies - December Challenge
     Perfectly CAS - Celebrate

Kath x

Wednesday, 20 November 2019

Christmas Pudding

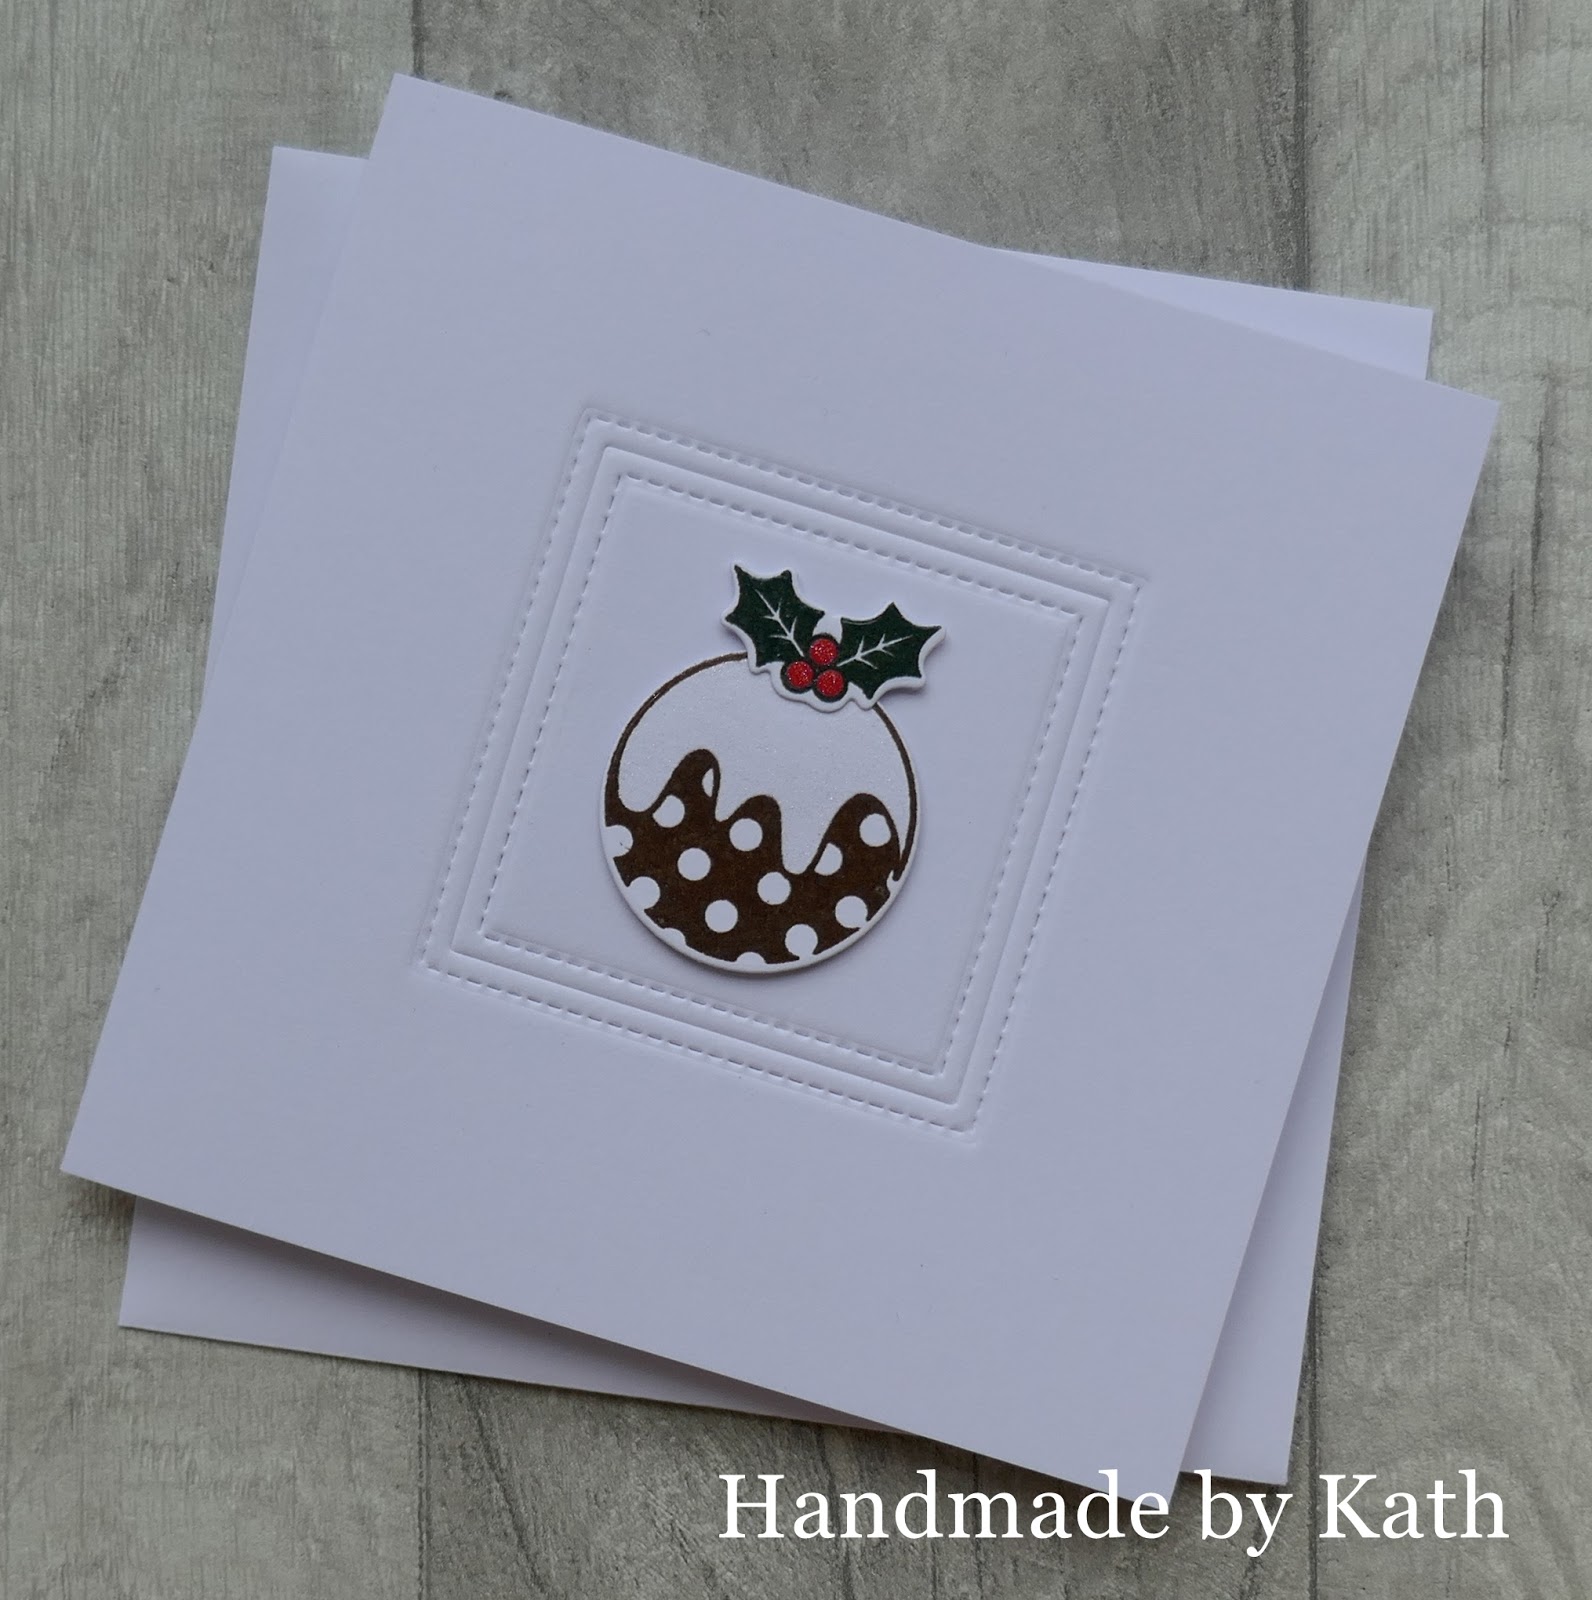
I do love Christmas pudding and this Clearly Besotted stamp and die set is perfect for making a quick and simple card.

I used my stitched square die to emboss a square in the centre of the card blank.  I stamped the pudding in brown ink and the leaves in green ink before embossing them with clear embossing powder.  Although there was a separate stamp and die for the holly berries I chose to colour them with Promarkers and add a Wink of Stella.  I also added a a good layer of Wink of Stella to the top of the pudding so it shimmered.  The pudding and holly were then attached to the centre of the card with foam pads.


To make this card I used:
     5" x 5" white matt card blank
     Clearly Besotted 'Christmas Pudding' stamps and dies, Lawn Fawn 'Outside In Stitched Square Stackables' die
     Versafine Vintage Sepia and Olympia Green ink
     Stampendous clear embossing powder
     Red Promarker
     Wink of Stella

I am entering the following challenges:
     AAA Cards - One Image + Optional Twist: Shimmer     
     Alphabet Challenge - Q for Quick and Easy     
     Perfectly CAS - Christmas
     Winter Wonderland - Use Holly and/or Ivy 

If you would like to share your views on printers and also have a chance to win a Clearly Besotted stamp and die set - please see my Questions about Printers and Giveaway post.

Kath x

Wednesday, 6 November 2019

Zig Zag Happy Birthday

I made this card using the colours from this week's CAS Colours and Sketches Challenge.

To make this card I die cut the zig zag die in white card and set it aside.  I die cut it in lilac pearlescent card and removed the inlaid zig zags leaving the frame inside the die.  I then inlaid the white zig zags - this is what I was doing in my previous post.  I covered the back of the die with double sided tape and removed the whole piece from the die and laid it across my card blank, trimming the ends flush with the card blank.  I die cut 'Happy Birthday' once from the yellow card and twice from red card.  I layered the two red die cuts on top of each other and then offset this on the yellow die cut to give a shadow.


To make this card I used:
     6" x 6" white hammer card blank
     Creative Expressions 'Clean and Simple - Zig Zag Border' and Crafts Too 'Happy Birthday' dies
     Snippets of lilac, red and yellow pearlescent card, white hammer card

I am entering the following challenges:
     AAA Cards - Maximimum White Space + Optional: Geometric
     CAS Colours and Sketches - Colour Challenge
     Perfectly CAS - Birthday

If you would like to share your views on printers and also have a chance to win a Clearly Besotted stamp and die set - please see my Questions about Printers and Giveaway post.

Kath x

Wednesday, 16 October 2019

Rainbow Birthday

I love rainbows so when I saw this week's prompt at Less Is More is 'Rainbow' I knew I had to get all of my snippets out to find some bright rainbow colours. 

To make this card I cut my snippets of card to 1/8" width.  I placed the strips across the corner of my card blank and made a pencil mark by the top strip.  I placed the card blank into my MISTI and lined up the 'Happy' stamp so it was just above my pencil line and then stamped it in black ink.  I removed the pencil line and attached the rainbow strips across the card using wet glue to give some 'wriggle room' so I could make sure there were no gaps between the strips.  I then trimmed the ends of the strips level with my card blank.  I stamped 'birthday' onto white card, die cut it with the coordinating die and attached it along the top strip.


To make this card I used:
     5" x 5" white matt card blank
     Clearly Besotted 'Modern Calligraphy' stamps and coordinating die
     Versafine Onyx Black ink
     Snippets of red, orange, yellow, green, blue, indigo and violet textured card, white matt card

I am entering the following challenges:
     AAA Cards - One Corner   
     Allsorts  Spots and/or Stripes (I've obviously gone for the stripes option!)
     Less is More - Rainbow
     Perfectly CAS - Birthday
     Pixie's Snippets Playground - Challenge 363

If you would like to share your views on die cutting  and also have a chance to a Clearly Besotted stamp and die sets - please see my Questions about Die Cutting and Giveaway post.

Kath x

Wednesday, 18 September 2019

Happy Birthday

I made this CAS birthday card for a few challenges - the idea seemed quite simple but it actually took a lot longer than I had anticipated to die cut the strip and get the stitching all around the edge of the strip.  On a more positive note, it did use up a lot of snippets from my box!

To start I die cut the sentiment from white hammer card and set it aside.  I attached a snippet of very dark green floral paper to thin white card and using a rectangle die I die cut a strip placing the dies so I had stitching on the short edges as well as the stitching along the long edges.  I did this by running the strip through my Cuttlebug four times - the first pass cut the short edge and half way down one long edge, the second cut the rest of the long edge and the other short edge, then lined it up again twice to die cut the other long edge - as I said, it took longer than I had anticipated!  I then die cut the sentiment from the right side and attached the strip along the lower edge of the card before inlaying the sentiment.  I punched a large and small daisy from white hammer card and attached them to the left of the sentiment and added an upcycled yellow gem for the flower centre..


To make this card I used:
     6" x 6" white hammer card blank
     My Favourite Things  'Inside & Out Stitched Rectangle STAX Die-namics' and Creative Expressions 'Mini Happy Birthday' dies
     Woodware 'Large Daisy' and 'Regular Daisy' punches
     Small hole punch
     Snippets of white hammer card, thin white matt card and Lili of the Valley 'Enchantment' paper
     Small yellow sparkly gem (upcycled from a birthday card)

I am entering the following challenges:
     AAA Cards - Up to One Third + Inlaid Die
     Perfectly CAS - Flowers
     Pixie's Snippets Playground - Challenge 361
     Seize the Birthday - Anything Goes

If you would like to share your views on ink and also have a chance to win two Clearly Besotted stamp sets - please see my Questions about Ink and Giveaway post.

Kath x