Sunday 28 April 2019

Kick up your Heels

I made this card for my brother-in-law's partner's birthday and am entering the Seize the Birthday 'Anything Goes' challenge, Crafty Creations Challenges 'Anything Goes' and Crafty Hazelnut's Patterned Paper Challenge.


6" x 6" white matt card
Bugaboo 'JJ Tequila and Shoes' digi stamp
Promarkers
Lili of the Valley 'Galaxy Stars' paper
White matt card

I merged the image and sentiment using Word, resized them and printed onto white matt card.  I trimmed the panel to a square and coloured it with Promarkers.  This panel was then layered onto pink star paper and attached to the card blank.

Kath x

Thursday 25 April 2019

April Rudolph Day

It's time for another Rudolph Day and another Christmas tree card.  I'm also entering the Happy Little Stampers Christmas Challenge 'Nature', the Holly and Ivy Christmas Challenge 'Anything Christmas Goes' and Crafty Hazelnut's Christmas Challenge 'Anything Goes'.  The card is from my snippets drawer so I'm heading into the playground at Pixie's Crafty Workshop.


6" x 4" white matt card blank
Sizzix Framelits 'Trees, Leafy' stamp and die
Versafine Haberna ink
Snippets of green texture card, orange and white matt card

I stamped the tree onto white card using the Haberna ink before trimming the panel to size.  This was then layered onto a slightly larger snippet of orange card and then onto a snippet of green textured card before being attached to the card front.  I used the coordinating die to cut the tree from green textured card.  This was attached with liquid glue to give some 'wriggle room' whilst I ensured the die cut tree lined up with the stamped image.

Kath x

Sunday 21 April 2019

Hunkydory Product Review

I was delighted to be invited to review some Hunkydory products and I chose a wide selection of  items.  These are some of the cards I've made and my review of the products is further down this post.

Using Deck the Halls backing card and topper from the  Hunkydory Design Collection Box
Magazine Issue 6 and 1mm Foam Pads


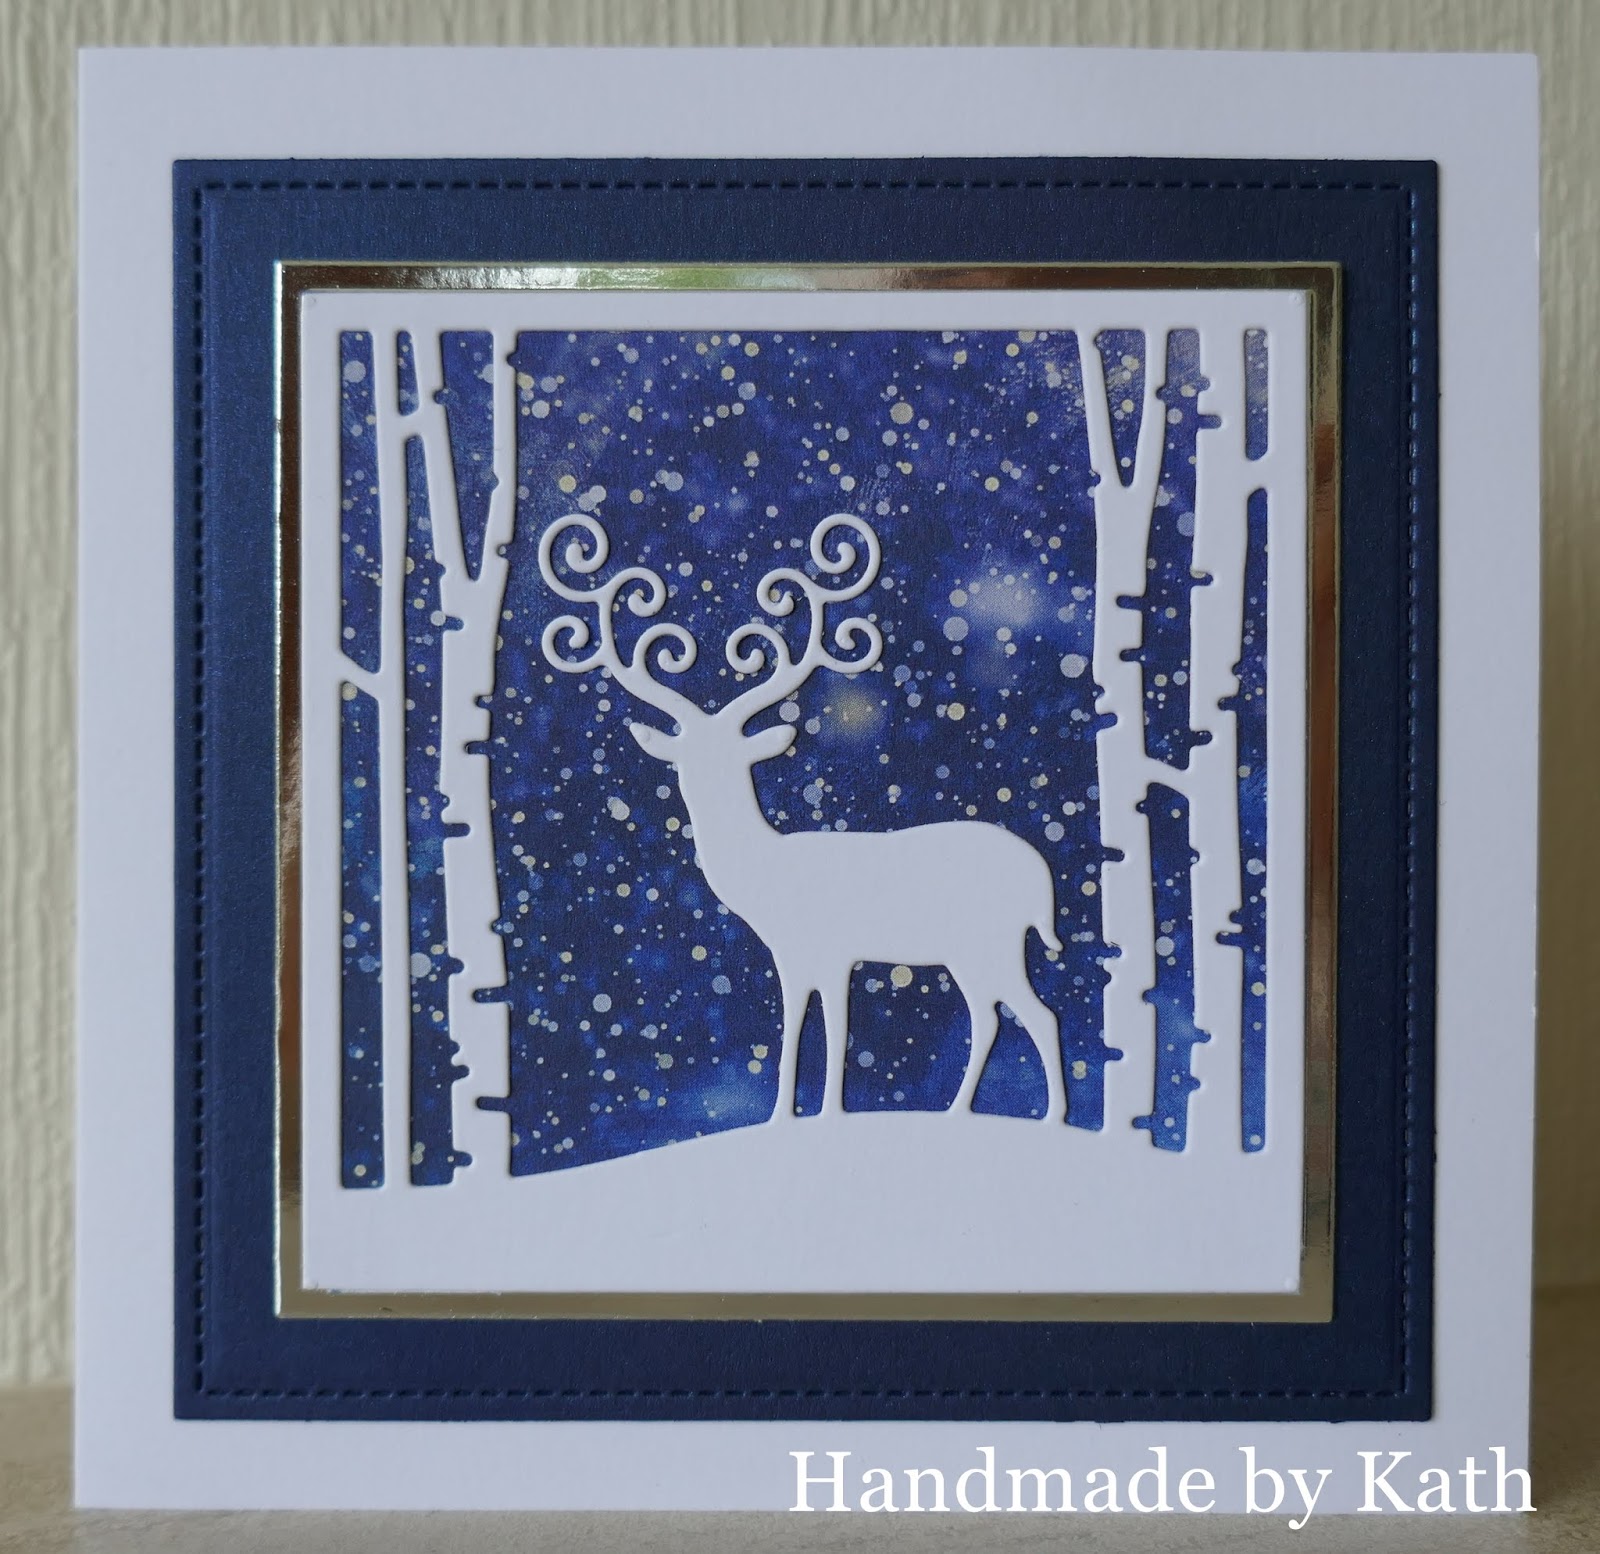
Using Winter Wishes backing card and toppers from the Hunkydory Design Collection Box
Magazine Issue 6, 1mm and 2mm Foam Pads


Using images from The Square Little Book of Florabunda


Using Peony Dreams Adorable Scorable card for card blank,
Peony Dreams backing card and topper from Member's gift


Using 4" x 4" Miniature Corner Rounder Aperture Card


Using Deck the Halls backing card from the Hunkydory Design
Collection Box and Merry Christmas die


Using Peony Dreams Adorable Scorable card for the box base, Peony Dreams
backing card and toppers from Member's Gift for box top, Contemporary Ribbon Reel
and Foam Pads 2mm Deep


After using these products, this is my personal review:

This is a bumper Christmas collection!  Inside the box there's a magazine of design ideas which gives clear instructions on how to make the projects, two card collections (Deck The Halls & Winter Wishes), six dies, a set of co-ordinating stamps and an embossing folder.  The quality of all the products is excellent.  Each card collection contains card, papers and toppers which are easy to mix and match.  The dies cut well, the stamps are good quality and give a clear stamped image and the embossing folder gives a lovely clean image too.

The Square Little Book of Florabunda - Product Code LBSQ105
This is a fabulous block of images, slightly smaller than 5" x 5".  There are 150 pages of beautiful blossoms and floral designs with 25 different designs and six of each which allows for decoupage or layering the images.  The paper has a slightly matt surface which means that it stamps well.  The colours are beautiful and work well with kraft card.

Peony Dreams Adorable Scorable Pack - Product Code: CLUB-AS19
I love Adorable Scorable card as it can be scored and folded without cracking and this pack contains beautiful subtle colours.  I chose this pack as it matches this months's Hunkydory Club Gift.  If you're not already a member of the Hunkydory Club, you can join for free and get the member's gift for just the cost of postage.  The images in the Peony Dreams collection are beautiful and can be used for so many occasions.

This is the only product that I found a little disappointing.  The quality of the card is very good and I love the unusual shape of the card and aperture.  The size is perfect for making small cross stitch cards - they just need a small piece of card to cover the rear of the fabric.  There were a few small 'pips' on the card which I needed to snip, which wasn't a problem, but the rounded corner on the folded edge wasn't cut very cleanly and I had to use a sharp pair or scissors to neaten the corner.  I know it's not a big issue, but I'm not sure I would buy these in the future.

Contemporary Ribbon Reel - Product Code: RIBB15 & Metallics Ribbon Reel - Product Code: RIBB16
These ribbon reels are lovely rich colours.  The Contemporary Ribbon Reel has Pink, Lilac, Silver and Blue ribbons and the Metallics Ribbon Reel has Deep Purple (I would have called it Burgundy), Silver, Grey and Red.  I would have liked to see a gold ribbon in the Metallics set instead of both Silver and Grey.  Don't buy these ribbons if you want a traditional satin ribbon to tie in small bows as the reels are more of a paper type of ribbon as used in gift wrapping.  For me, this was perfect as it meant I could use the ribbon on my cards (and box) without having to tuck edges under to prevent them fraying.

Foam Pads - 2mm Deep - Size 19mm x 38mm - Product Code: FOAM127 & Foam Pads - 2mm Deep - 19mm x 38mm - Product Code: FOAM128
I've not used the Hunkydory foam pads before which is why I wanted to try these two thicknesses.  I like the larger size of foam pad as I can either use them as one large pad or trim them to a smaller size.  The backing peeled off easily and the quality is very good - definitely a product I'll buy in the future.

Kath x

Wednesday 17 April 2019

Upcycled Christmas

I made this card for the Jingle Belles 'Peace on Earth Day' challenge using two upcycled Christmas cards.  I'm also entering the Holly and Ivy Christmas Challenge 'Anything Christmas Goes', the Merry Little Christmas Challenge 'Anything Christmas Goes' and Crafty Hazenut's Christmas Challenge 'Anything Goes'.


7" x 5" dark red embossed card blank
Two upcycled Christmas cards
Woodware Corner Rounder punch
White card

I trimmed the front of the Christmas card with the aperture so it was slightly smaller than the card blank and rounded the corners.  I laid the aperture over the second card and trimmed the image so it was slightly larger than the circle and attached it to the rear.  As the second card was square and not oblong I added a small piece of white card above it before attaching it to the card.

Kath x

Sunday 14 April 2019

Snowy Friends

I made this card for the Christmas Kickstart Challenge 'Frosty and Friends'.  I'm also entering Crafty Hazelnut's Christmas Challenge 'Include a Snowman, Woman or Family and Happy Little Stampers Anything Goes with Dies challenge.


5" x 5" white matt card blank
Lili of the Valley 'Snowy Friends' Christmas Art Sheet
Spellbinders Nestabilities 'Classic Squares Large' and Lacy Squares
Kars tan embossing mat
Turquoise pearlescent card

I die cut and embossed the turquoise frame using the largest Lacy Square and the second largest Classic Square.  This was attached to the card blank.  I used the second largest square to die cut and emboss the snowman image from the Art Sheet before inlaying the image into the frame.

Kath x

Wednesday 10 April 2019

Penguin Trio

I made this card for the Jingle Belles 'Three of a Kind' challenge.  I'm also entering the Bugaboo Weekly Challenge 'Anything Goes' and Crafty Hazelnut's Christmas Challenge 'Anything Goes'.


DL white matt card blank
Bugaboo 'Penguin Trio Blocks' digi stamp
Lili of the Valley 'Galaxy Stars' paper pad
Promarkers
Purple mirri and white matt card
Diamond Stickles
Wink of Stella

I trimmed the turquoise paper, layered it onto purple mirri and attached it to the card blank.  I printed the digi stamp onto white card and trimmed around the edge leaving a white border.  The penguins were coloured with Promarkers before the panel was layered onto purple mirri and attached to the centre of the card.  To finish I added Diamond Stickles to the snow and highlighted the penguins' clothing with a Wink of Stella.

Kath x

Monday 8 April 2019

Upcycled Easter Card

I made this card for Tales from the Craft Room 'Easter/Splring' challenge.  I'm also entering the Crafty Gals Corner 'Spring is Here' challenge, Crafty Cardmakers 'Easter' challenge and Crafty Creations Challenges 'Anything Goes'..


5" x 5" white matt card blank
Upcycled Easter card
Lawn Fawn 'Outside In Stitched Square Stackables' die3s
Making Cards 'Landscapes' paper
White card

I attached the paper to thin white card to make it sturdier for die cutting and also so it was the same thickness as the upcycled card.  I then used the two largest dies to make a frame and attached it to the card blank.  I used the smaller of the two dies to cut a square from the Easter card, ensuring the sentiment was in the middle of my die cut.  I then inserted this panel into the die cut frame.

Kath x

Friday 5 April 2019

Christmas Owl

It's time for a new challenge at Winter Wonderland and this month our theme is 'Cute Christmas'.  We are sponsored by Imagine That Digistamp who are offering the lucky winner a $10 voucher to spend in their store.

I'm entering the Imagine That Digistamp 'Anything Goes' challenge, Crafty Hazelnut's Christmas Challenge 'Anything Goes' and the Holly and Ivy Christmas Challenge 'Anything Christmas Goes'.


7" x 5" white matt card blank
Imagine That Digistamp 'Christmas Owl' digi stamp
Promarkers
Red mirri card, white matt card
Wink of Stella

I resized the owl and sentiment and merged the images with Word before printing them onto white card.  The panel was trimmed and coloured with Promarkers before being layered onto red mirri card and attached to the card front.  To finish I added a Wink of Stella to the owl's candy body and hat, the cupcake and snow.

Kath x

Tuesday 2 April 2019

One Sheet Easter Bag

I'm so pleased to be invited to join the Cuttlebug Mania team as their Guest Designer for the 'Make a Project with the Easter Bunny' challenge.  My project is a one sheet bag that I've decorated with an Easter rabbit and filled with small Easter eggs.

I'm entering the Cardz 4 Gals 'Flora or Fauna' challenge and the Dies R Us 'Anything Goes' challenge. The card and ribbon are from my snippets drawer so I'm also heading into the playground at Pixie's Crafty Workshop.


Joanna Sheen 'Easter Rabbit', Spellbinders Shapeabilities 'Garden Weave', Creative Expressions 'Pierced Tags' dies
Kars tan embossing mat
Woodware 'Regular Daisy' punch, hole punch
Stampendous 'Joyous Easter' stamp
Versafine Vintage Sepia ink
Hunkydory 'All Things Bright and Beautiful' paper
Snippets of brown pearlescent card, green textured card. pink, black, white and gold matt card.

I scored down each long edge of the A4 paper at 2½ inches and down each short side at 4½ inches, and folded along the score lines a few times to make them flexible.  With the patterned side of the paper facing down and the paper in portrait position I brought the long narrow panel over the middle panel and folded it back diagonally.  This was repeated on all corners. (If these instructions don't make sense, they can be found in the 'Everyone Needs A Hougie 2' booklet.)  I decorated the bag before the final assembly as I find this easier.

I die cut and embossed the Garden Weave from green textured card, trimmed it slightly so it was the same width as the bag and attached it to the front.  I die cut the Easter Rabbit from brown pearlescent card, the ears from pink card, nose from black card and bow from gold card before attaching them to the bag.  I punched six daisies from white card and three small circles from gold card to make the double layer daisies which were attached to the lower edge of the bag.  The bag was assembled by gluing the sides and I punched two small holes in the top.  I stamped the sentiment onto white card before die cutting and embossing the tag.  To finish I fastened the bag with white ribbon, attached the tag and tied the ribbon in a bow.

Kath x

Monday 1 April 2019

Feature a Creature

It's time for a new challenge at Sparkles Christmas Challenge and we want you to 'Feature a Creature'.

I'm entering the Christmas Kickstart Challenge 'Delectable Die-Cuts', the Dies R Us Challenge 'Anything Goes', the Alphabet Challenge 'A is for Animals' and the Merry Little Christmas Challenge 'Anything Christmas Goes'.


5" x 5" white matt card blank
Creative Dies 'Woodland Scene' die, Lawn Fawn 'Outside In Stitched Square Stackables' & Spellbinders Nestabilities 'Classic Squares Large'
Making Cards magazine 'Together' paper
Dark blue pearlescent card, silver mirri card and white matt card

I die cut the Woodland Scene from white card and snipped the tree away before attaching to the blue paper and trimming around the edge.  I die cut and embossed the largest stitched square from blue pearlescent card and the largest classic square from silver mirri card.  I layered the scene onto the silver square and the blue square before attaching it to the card front.

Kath x

Snowman Friends

It's time for a new challenge at Christmas Crafts All Year Round and our theme this month is 'Family/Friends'.

I'm entering the Christmas Kickstart Challenge 'Delectable Die-cuts', Imagine That Digistamp Challenge 'Anything Goes', Crafty Hazelnut's Christmas Challenge' Anything Goes' and Crafty Hazelnut's Patterned Paper Challenge.


6" x 6" white matt card blank
Bugaboo Stamps 'Snowman Friends' digi stamp
My Favourite Things 'Stitched Jumbo Fishtail' and My Favourite Things 'Fishtail Flags' dies
Kars tan embossing mat
Promarkers
Lili of the Valley 'Woodland Wishes' paper
Dark cerise textured card, white matt card
Wink of Stella
Computer generated sentiment 'Copperplate Gothic Light' font

I trimmed a piece of paper to a square, layered it onto cerise card and attached it to the card front.  I resized the digi stamp before printing onto white matt card. The image was die cut and embossed with the largest fishtail die.  As I wanted to extend the length of the fishtail, I also die cut and embossed a piece of white card with the square end of the die.  I coloured the image with Promarkers, matching the colours to the backing paper.  I drew around the outside the the fishtail die to make a matting layer for the image before cutting it out.  The image and white extension card were layered onto the cerise matt and attached to the card.  I printed the sentiment onto white card and placed the fishtail flat die onto the sentiment before die cutting and embossing halfway along the sentiment.  I removed the die, lined it up at the other end of the sentiment before die cutting and embossing the other half.  The strip was then layered onto cerise card before being attached to the card to cover the join in the image fishtail banner.  To finish I added a Wink of Stella to the snowman's clothing and the snow.

Kath x